Are you looking to sell your products on Amazon? If yes, the first step is to register yourself as a seller by creating an Amazon seller account, also known as a Seller Central account.
The process may seem daunting but don’t worry because we’re here to help.
In this post, we’ll guide you through the process of creating an Amazon Seller Central account, step-by-step, so you can start selling your products on the world’s largest online marketplace.
Amazon Seller Central Account
Related: How to Sell on Amazon for Beginners - Complete Guide
How to Sell on Amazon as an Individual Seller - Complete Guide
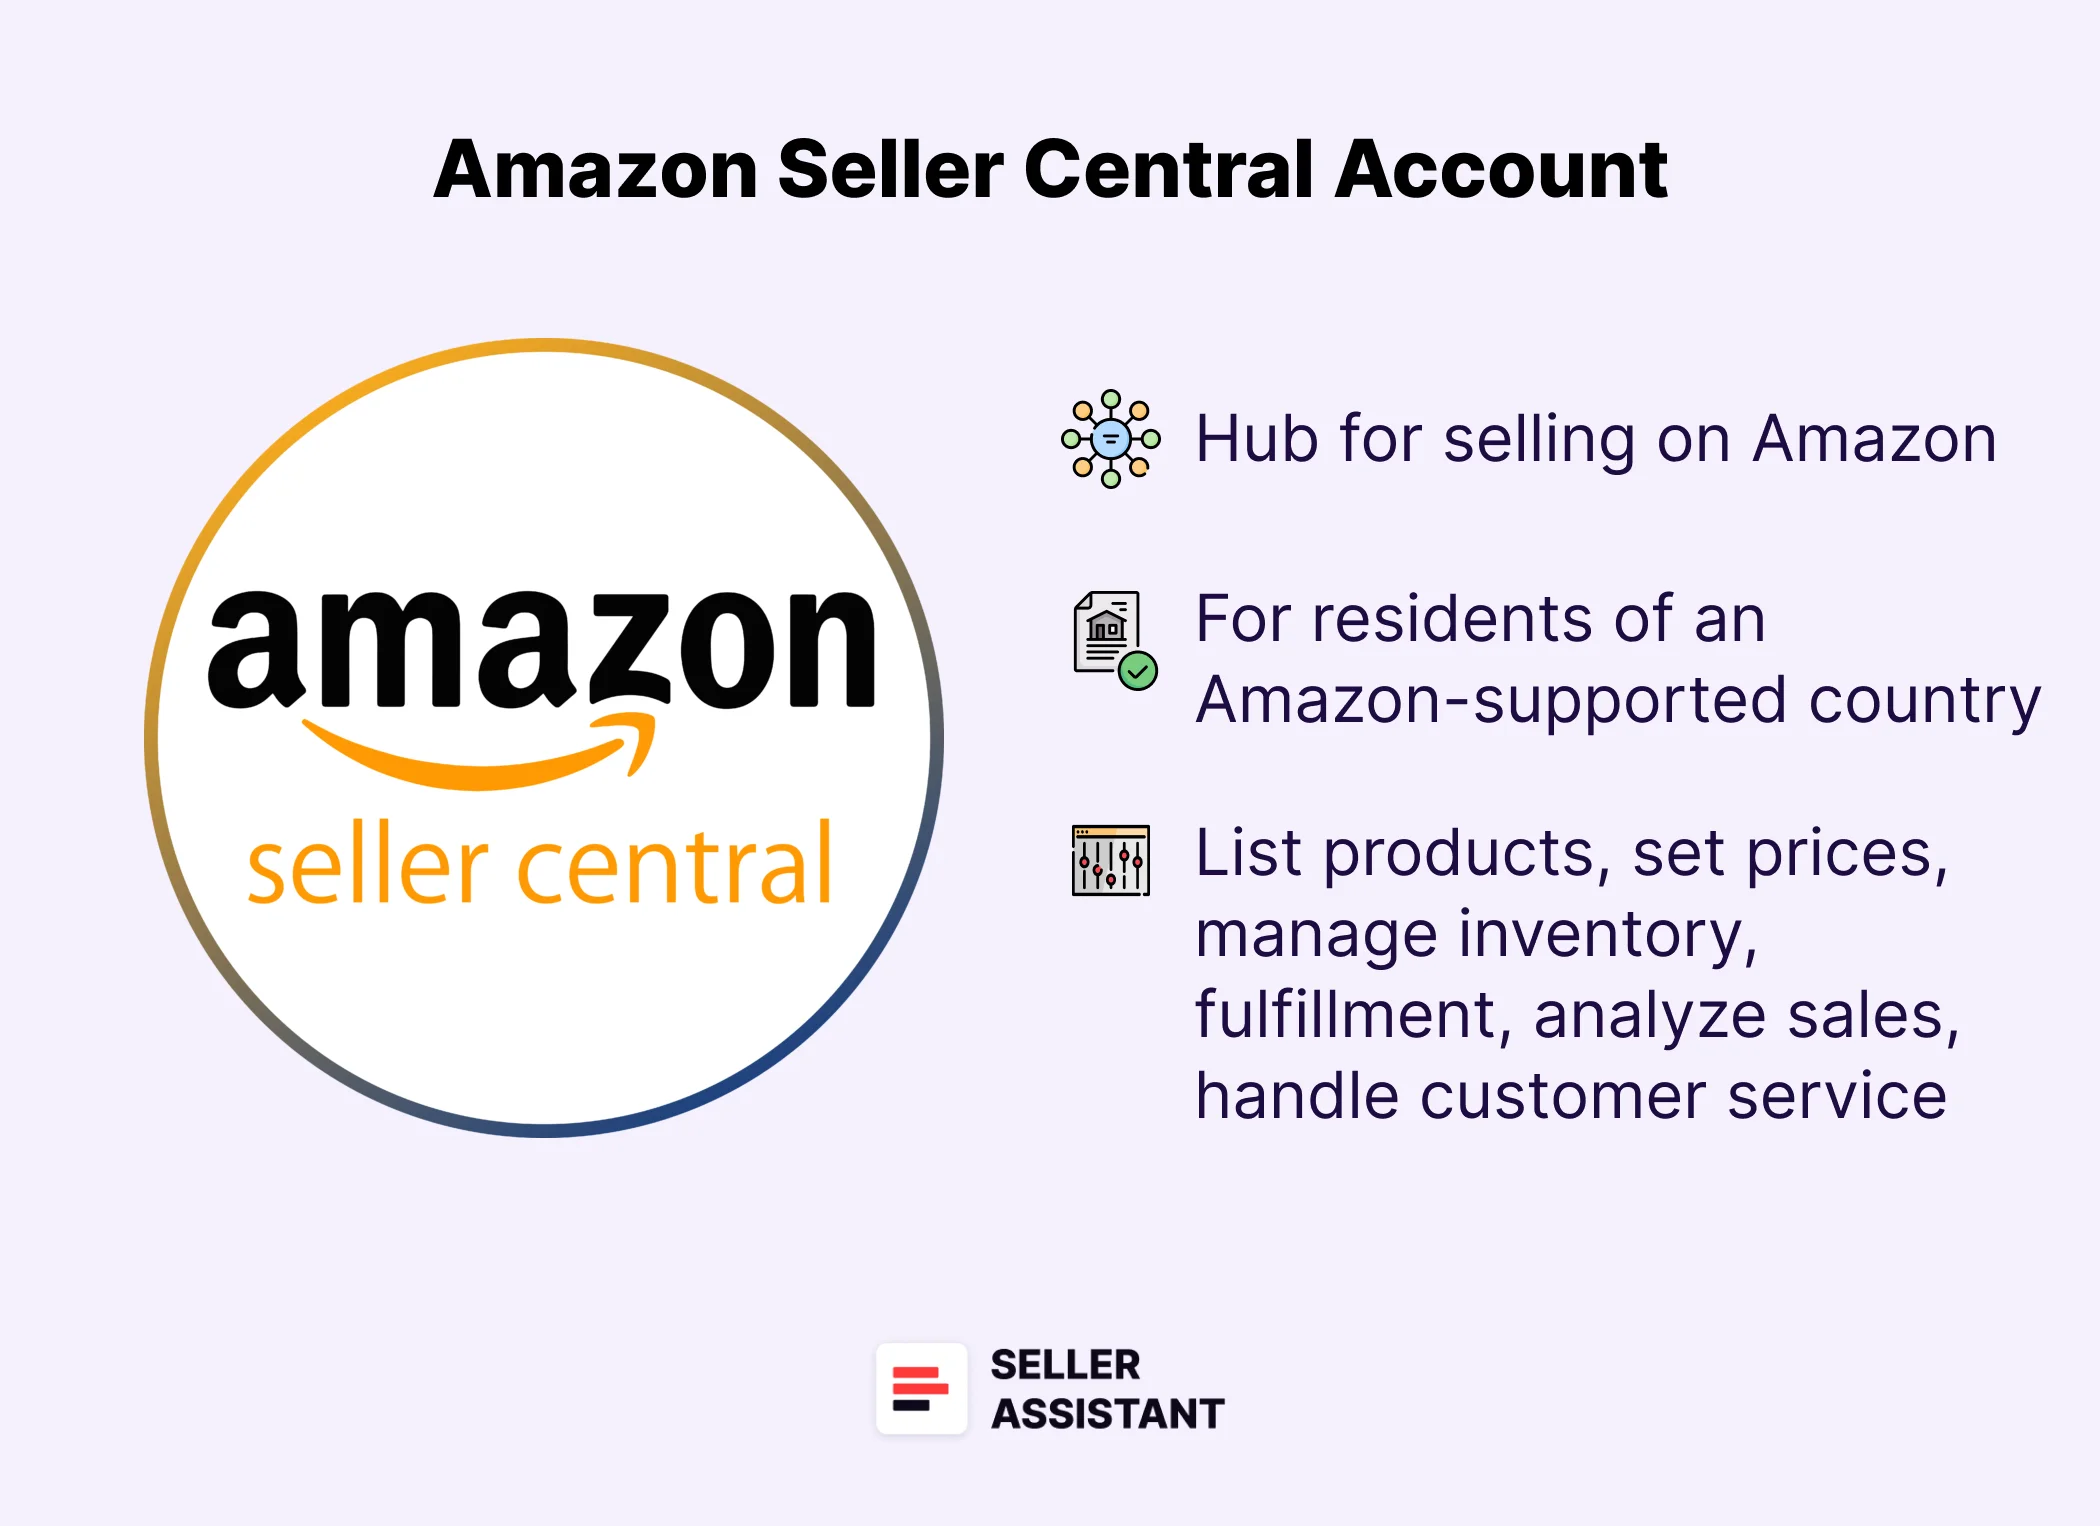
What Is an Amazon Seller Central Account?
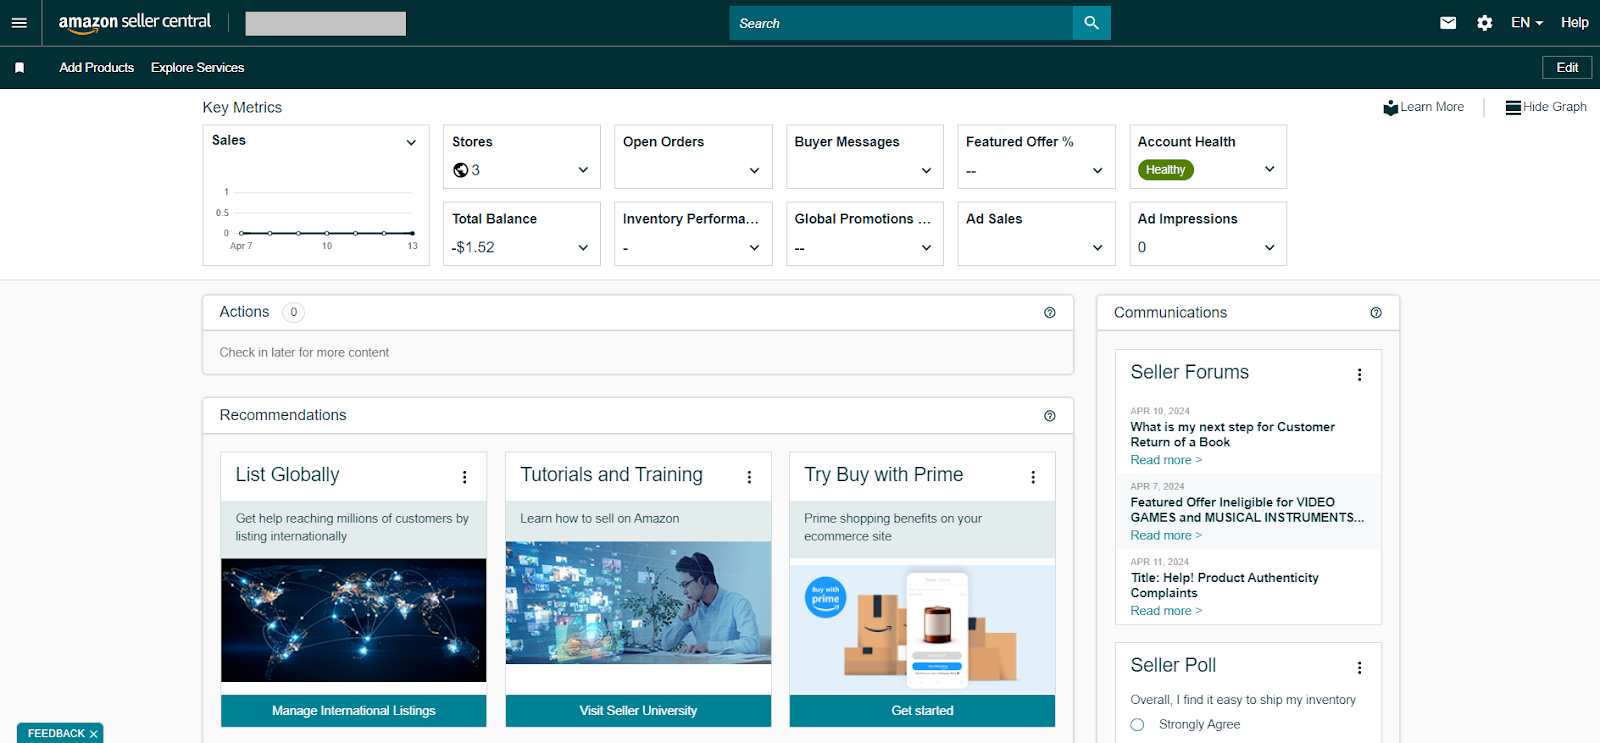
Your Amazon Seller Central account serves as your hub for selling on Amazon. It’s a web interface that lets you manage all aspects of your Amazon business, from listing and pricing products to fulfilling orders and tracking sales. Seller Central puts all the tools you need to run your Amazon store in one place.
Creating a Seller Central account is the first step to selling on Amazon. Every seller who sells on Amazon must have a Seller Central account. It’s your one-stop shop for everything. You can list products, set prices, manage inventory, track fulfillment, analyze sales data, and even handle customer service inquiries – all from a single dashboard.
Amazon Seller Central account
Related: Amazon Business Models
Seller Assistant Extension Review
Note. The process of creating an Amazon Seller Central account may be slightly different depending on the country where you live. You may be requested to provide different documents and the verification time may be shorter or longer. However, the main steps are the same for all sellers.
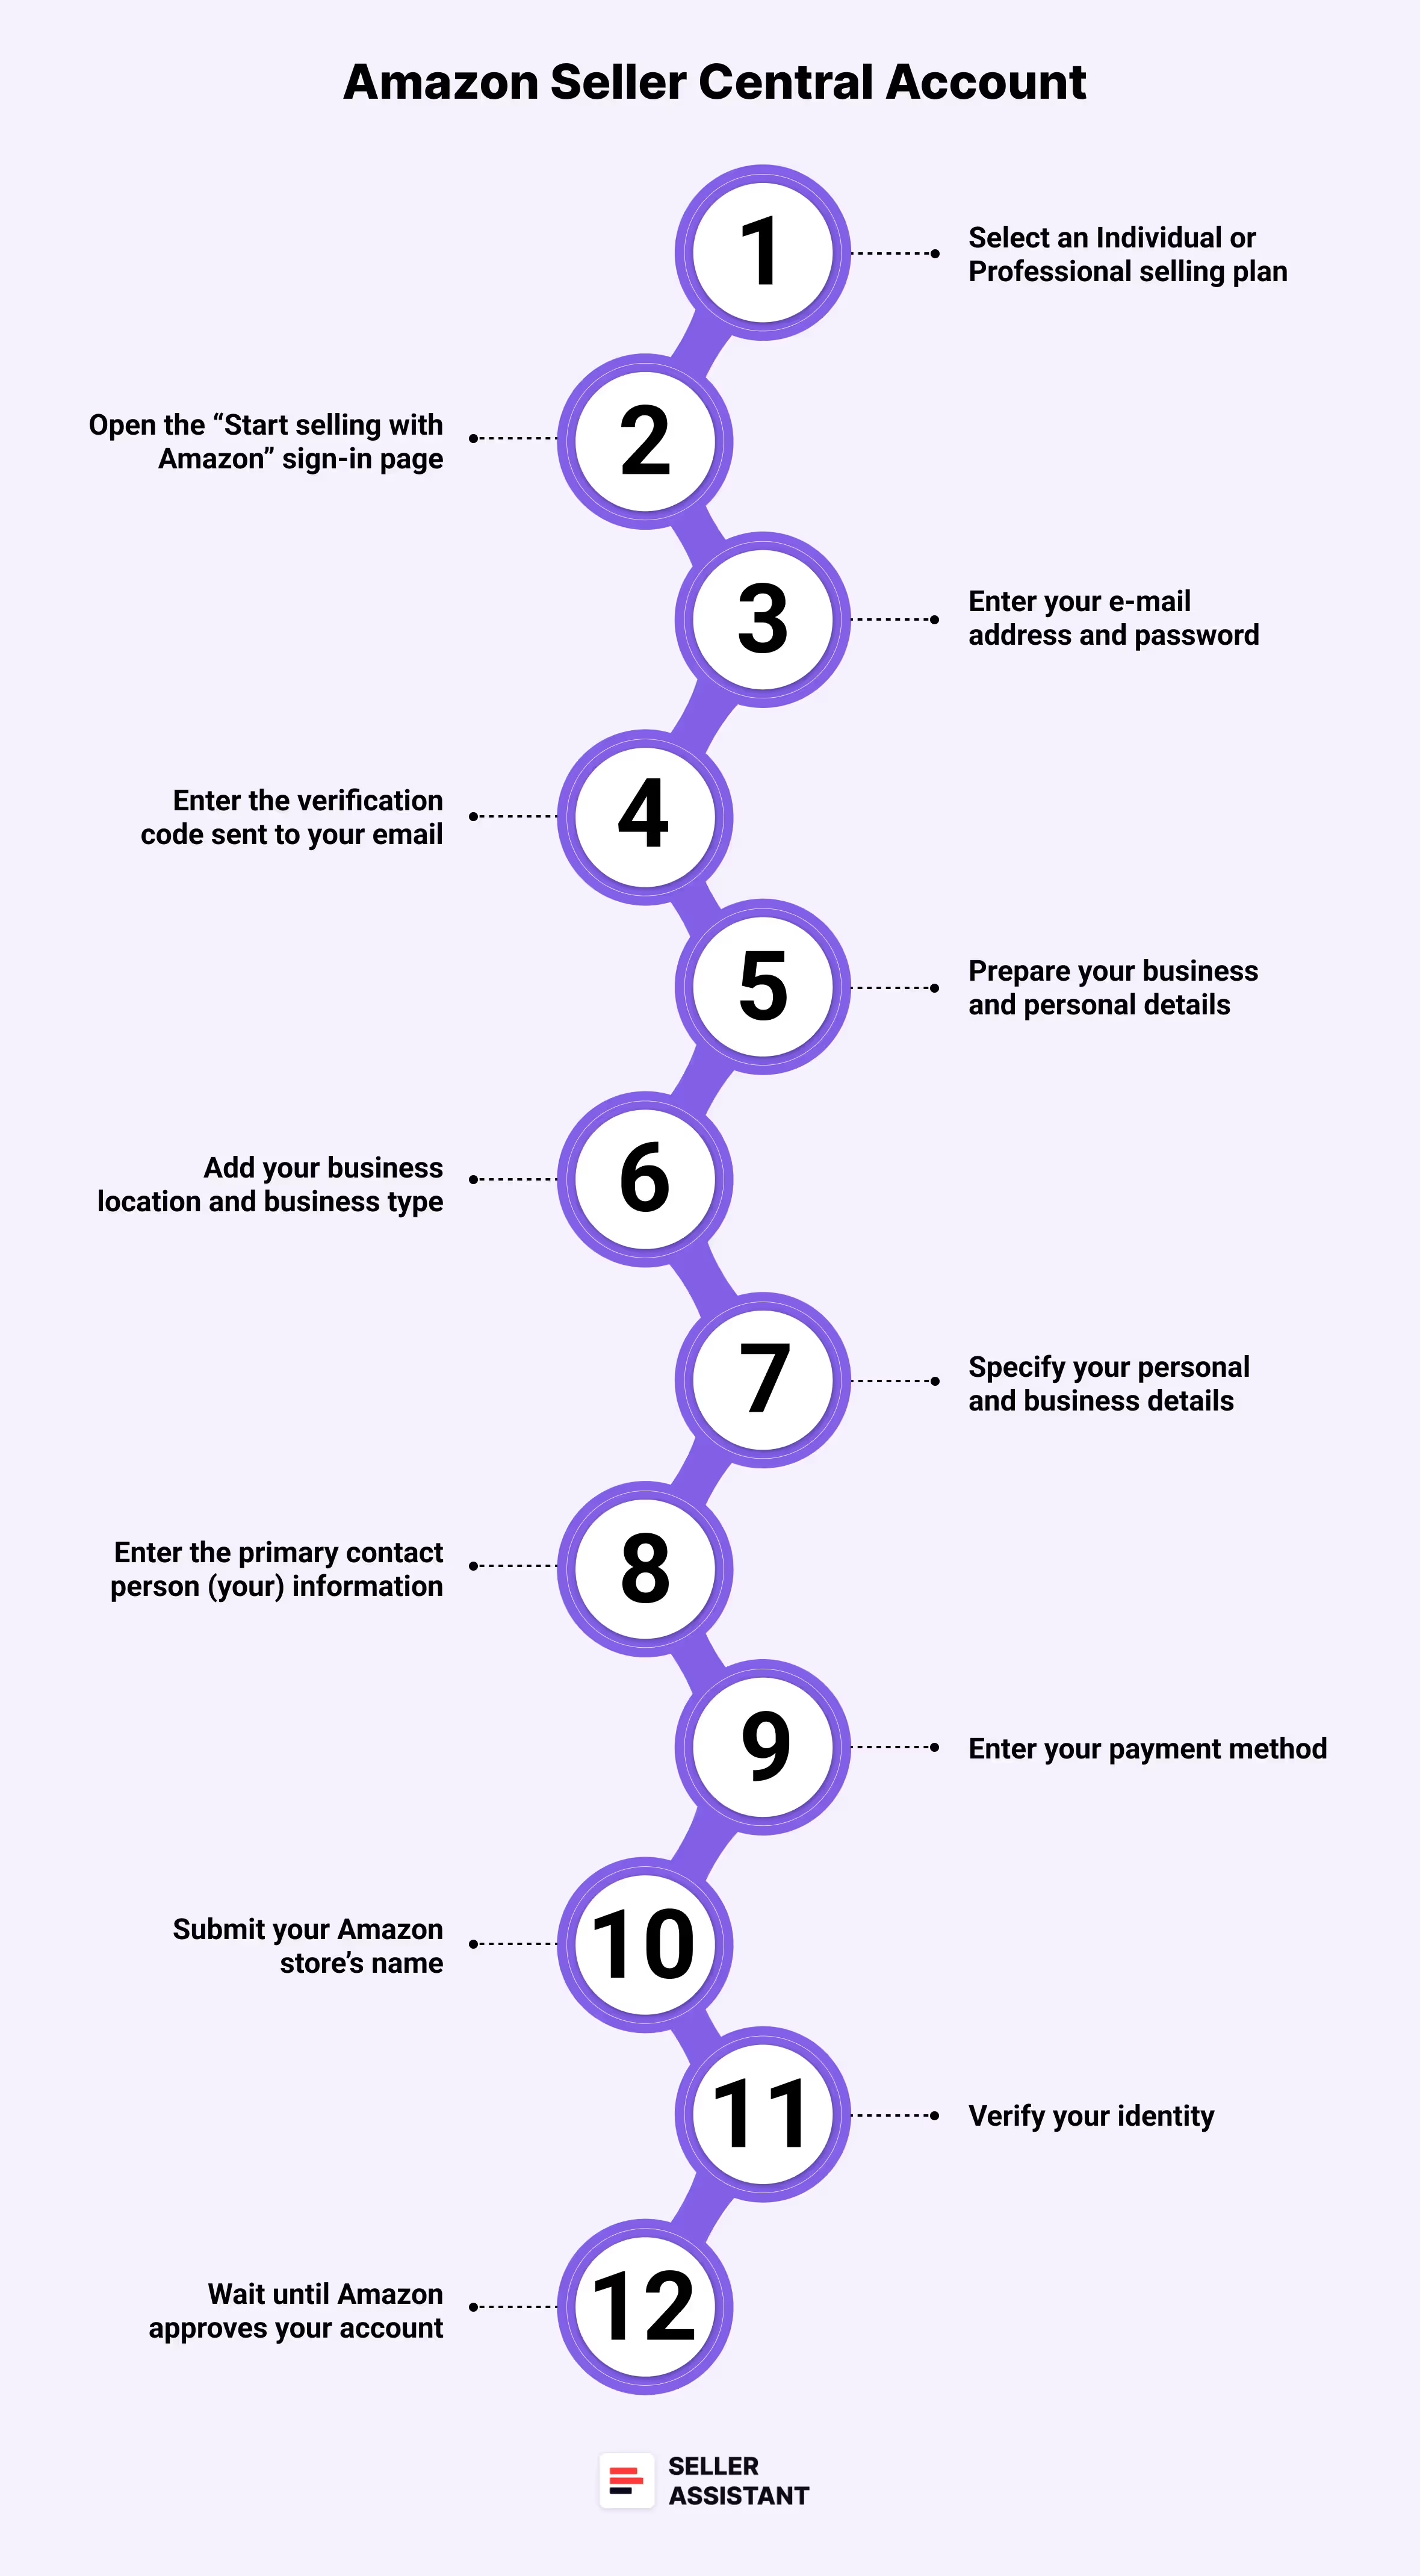
12 steps to creating an Amazon Seller Central account
Step 1. Select an Individual or Professional selling plan
Step 2. Start registration
Step 3. Enter your login information.
Step 4. Enable two-step account verification: Enter the verification codes sent by Amazon.
Step 5. Prepare your business and personal details
Step 6. Add your business location and business type.
Step 7. Specify your personal and business details.
Step 8. Enter the primary contact person (your) information.
Step 9. Enter your payment method.
Step 10. Submit your Amazon store’s name.
Step 11. Verify your identity.
Step 12. Wait until Amazon approves your account.
.webp)
12 steps to creating an Amazon Seller Central account
Below we will discuss all these steps in detail to help you make your registration process smooth.
Related: Amazon Account Health: A Guide for FBA Sellers
What is Amazon Seller Account Health Rating?
Amazon Business Models: How to Choose the Right One?
Step 1. Select an Individual or Professional selling plan
Before you register your Seller Central account, you must decide on the selling plan you will use. That is because the payment terms are different and you will start registration in different places on Amazon’s webpage.
There are two selling plans on Amazon—Individual and Professional. It is essential to select the right one. An Individual plan is suitable for you if you plan to sell single products occasionally. A Professional plan is a perfect opportunity if you sell many products monthly.
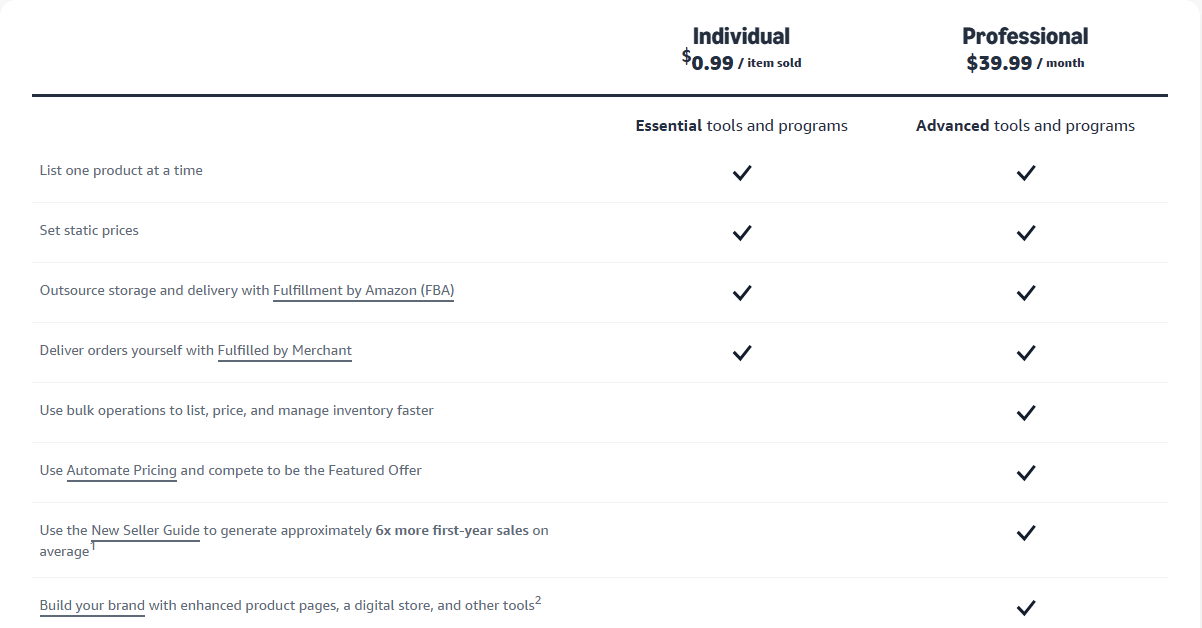
Amazon selling plans
Related Amazon Seller Central vs. Vendor Central: All You Need To Know
How to Sell on Amazon as an Individual Seller - Complete Guide
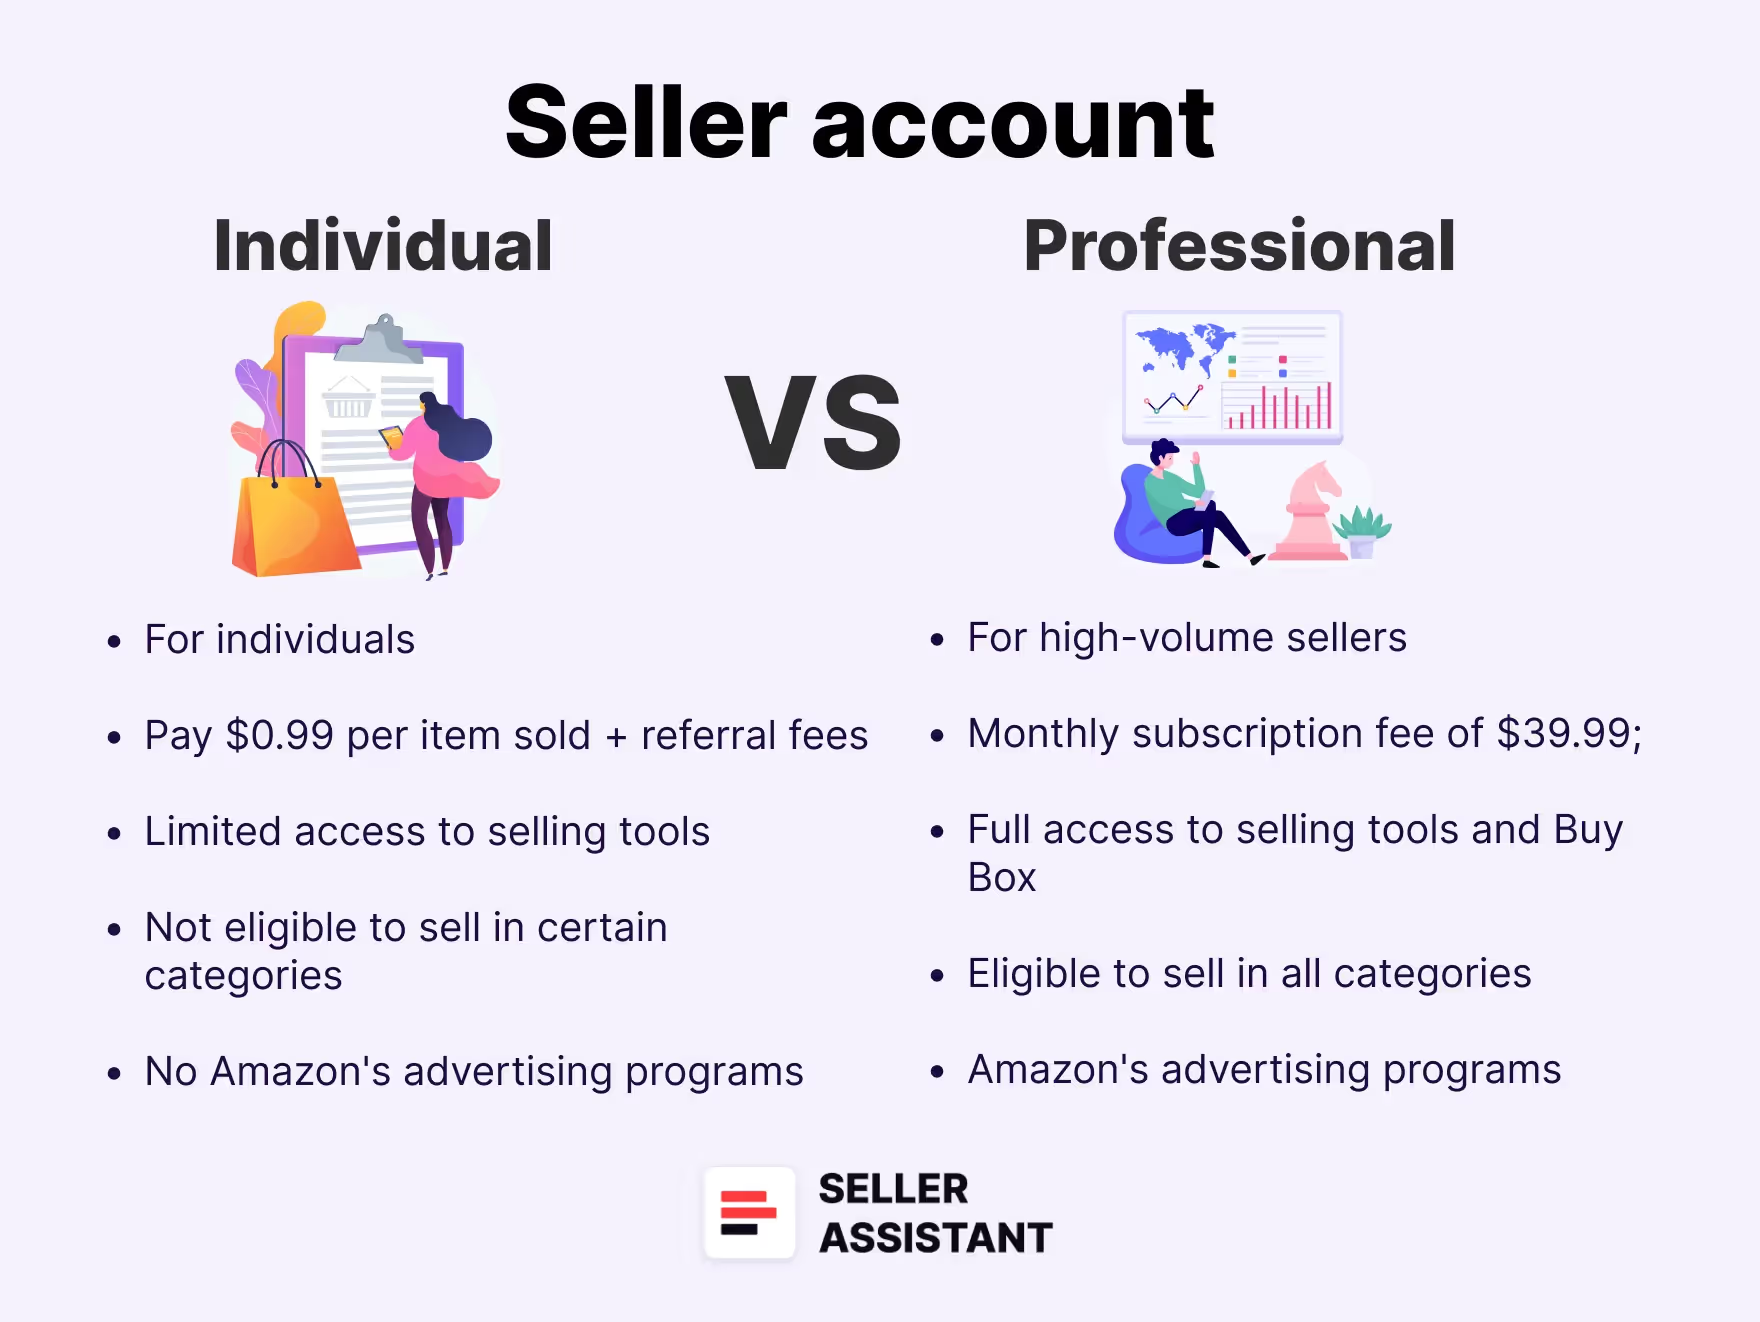
Individual selling plan
Under the Individual plan, there is no monthly payment. However, you will be charged $0.99 for every unit you sell. This plan is viable for you if you’re going to sell less than 40 products per month.
Reasons to select an Individual plan
- you plan to sell less than 40 units monthly;
- you’re testing what to sell;
- you’re going to sell from time to time;
- you’re not going to advertise or use advanced seller tools.
Professional selling plan
With a professional account, you’ll pay $39.99 per month. A Professional account will save you money if you plan to sell more than 40 products monthly.
In addition, the Professional plan gives you access to many marketing and reporting tools. You can qualify for the Buy Box, enroll in different seller programs, and more.
Reasons to select a Professional plan
- you plan to sell more than 40 units a month;
- you want to advertise your items;
- you intend to qualify for top placement on product detail pages («win the Featured Offer (“Buy Box ”));
- you’re going to use Amazon marketing, selling, and reporting tools;
- you want to enroll in seller programs;
- you plan to sell products in restricted categories.
.webp)
Individual selling plan vs. Professional
Once you’ve selected between the Individual and Professional selling plans, start creating your Seller Central account.
Note. You can upgrade from an Individual to a Professional plan at any time.
Related: The best Amazon Online Arbitrage Tool — Seller Assistant
How to Dropship on Amazon with Seller Assistant
How to Choose Wholesale Products to Sell on Amazon?
Step 2. Go to Amazon to start registration
Open the ‘Start selling with Amazon’ sign-in page. Here, you have 2 registration options depending on the selling plan you’ve chosen in step 1 above.
Registering as a Professional seller
If you want to register for a Professional plan, click the Sign-up button below “Start selling on Amazon”.
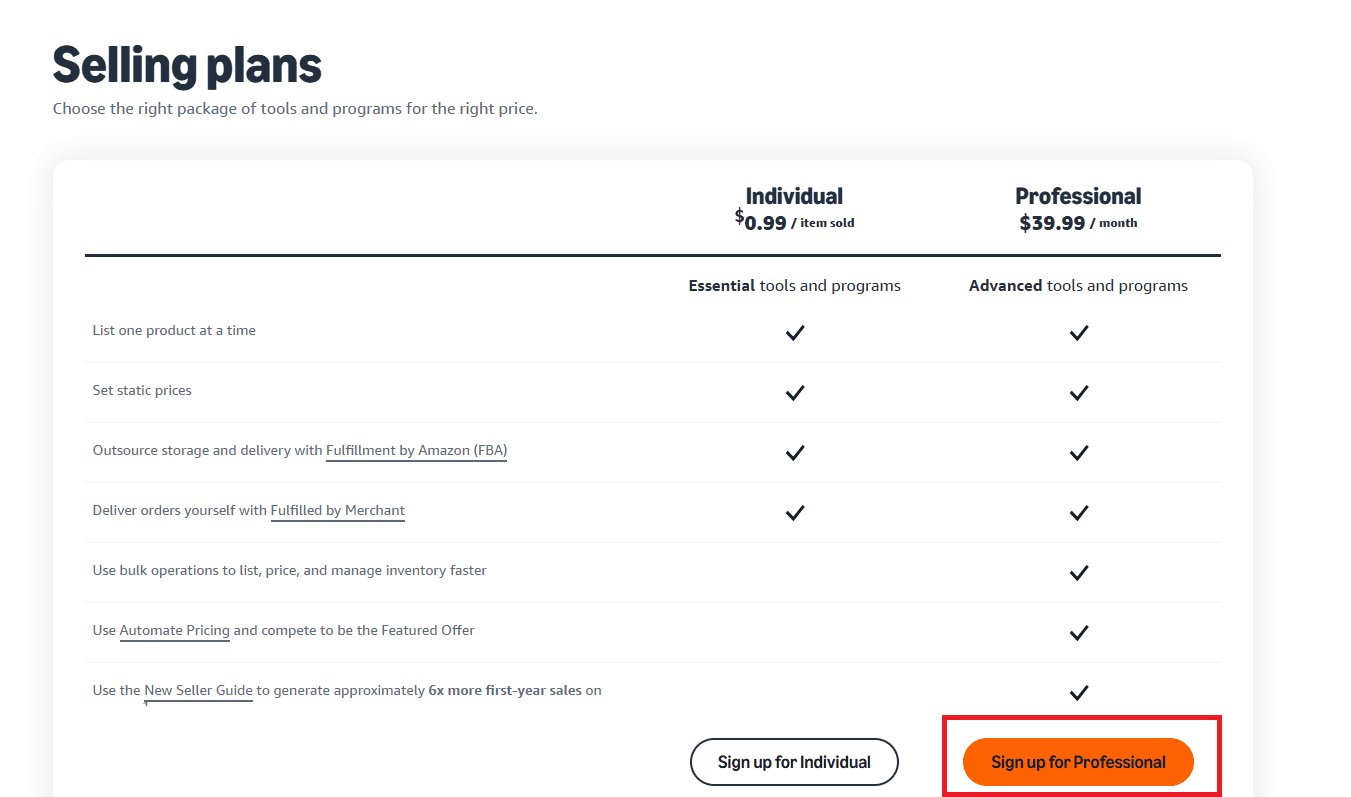
If you want to register for a Professional plan, click the “Sign up for Professional” button below the selling plans description.
Registering as an Individual seller
If you want to register for an Individual plan, scroll down to the bottom of the page and click “Sign up to become an individual seller.”
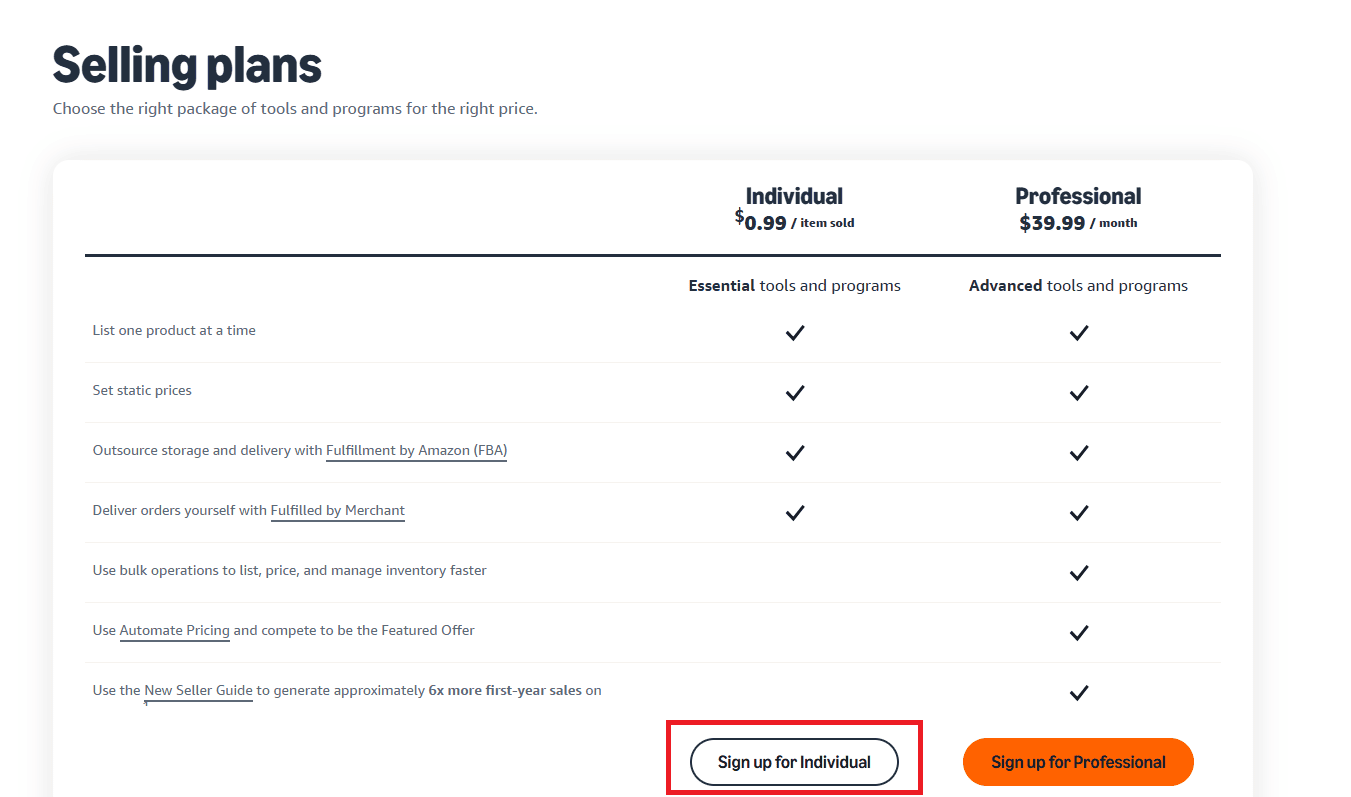
If you want to register for a Professional plan, click the “Sign up for Individual” button below the selling plans description.
Step 3. Enter your login information
After selecting the selling plan, you will get to the next page, where must enter your email address and a password for your account. If you don’t have an account on Amazon as a buyer, click “Create your Amazon account”. If you have it, enter your email (or mobile number) and password.
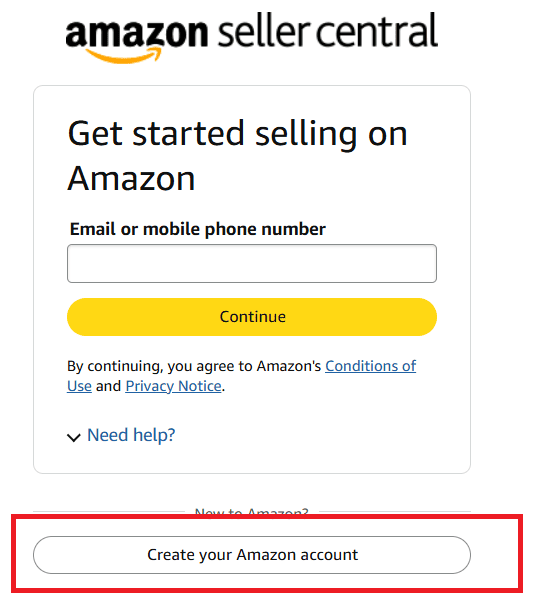
Enter your login information
To start creating a new account, enter your first and last name, email, and a password of at least 6 characters. Then, re-enter the password in the line below.
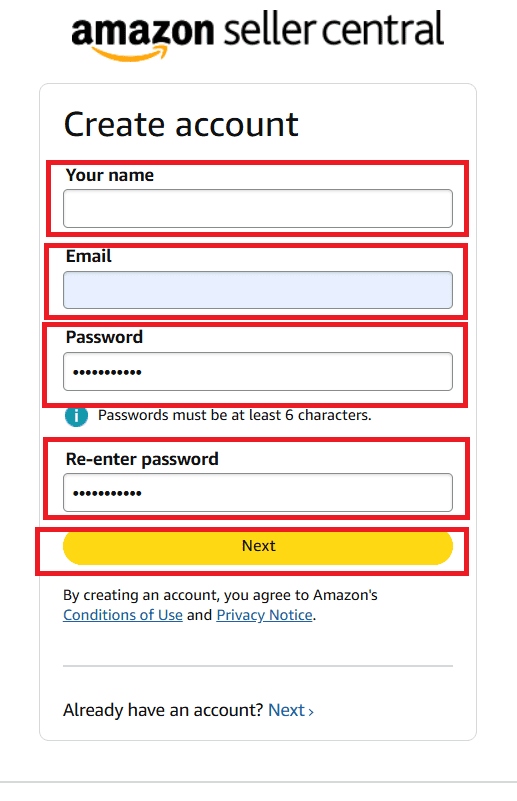
Enter your first and last name, email, and a password of at least 6 characters.
Once done, click “Next.” If you have an Amazon account, go to “Already have an account?” and click “Next.”
Step 4. Enable two-step account verification
You will get to the “Verify email address” page. Amazon will send the verification code (OTP) to your e-mail. Find the message from Amazon in your email inbox, copy the OTP, and enter it in the “Enter OTP” field. Then, click “Create Amazon account.”
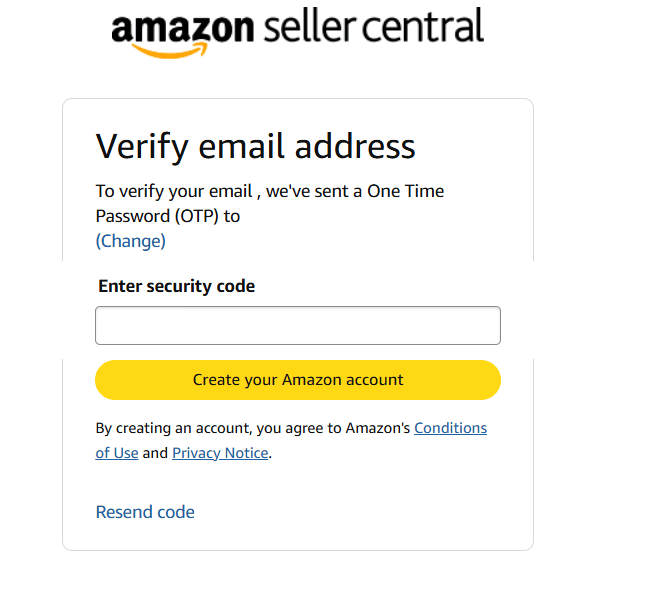
Verify your email address
Enable two-step verification. Add your phone number, get a verification code, and enter it.
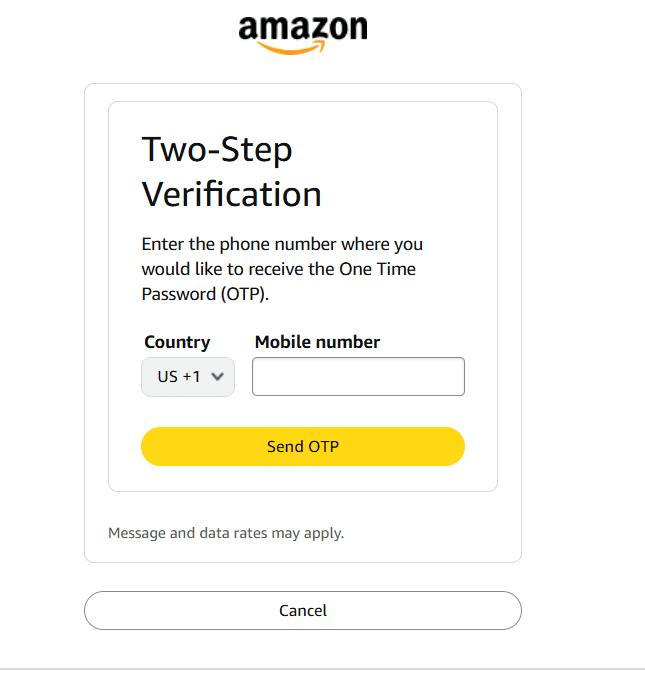
Enable two-step verification
Step 5. Prepare your business and personal details
After you’ve completed the email verification, you’ll get to the welcome page. Here Amazon explains what documents you’ll need and gives a short overview of the registration process.
To register an Amazon Seller Central account, Amazon will ask you to submit your personal details, like your business address, bank details, and more. To speed up the registration process, prepare all you need in advance.
What is needed to register Seller Central account
- valid government ID or passport;
- bank account or credit card statement;
- valid credit or debit card;
- mobile phone.
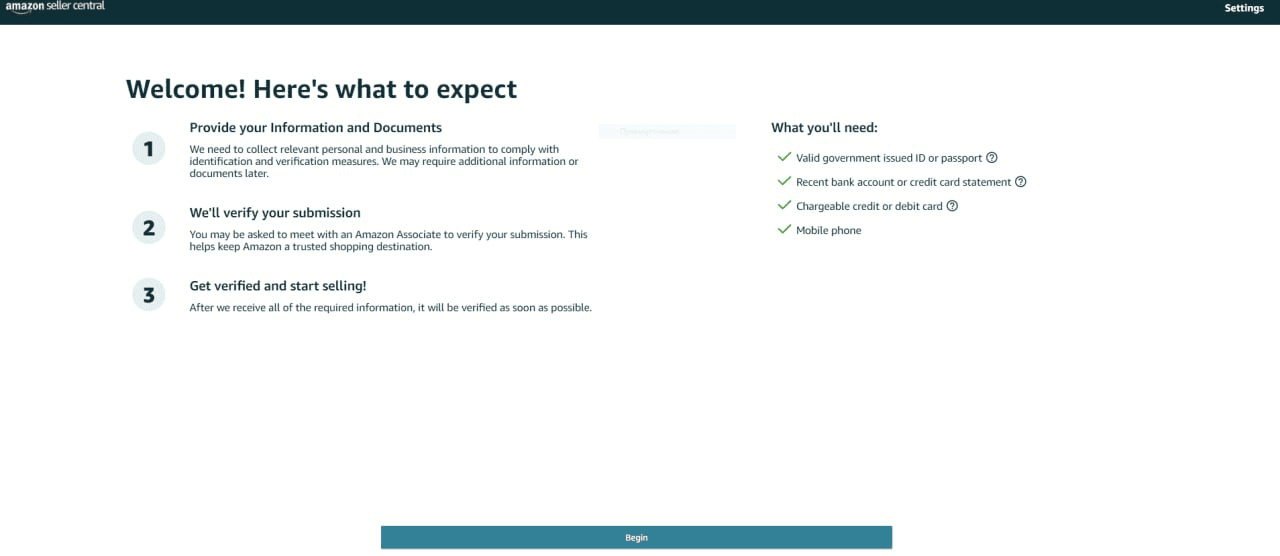
Prepare your business and personal details
Read the information and click “Begin.”
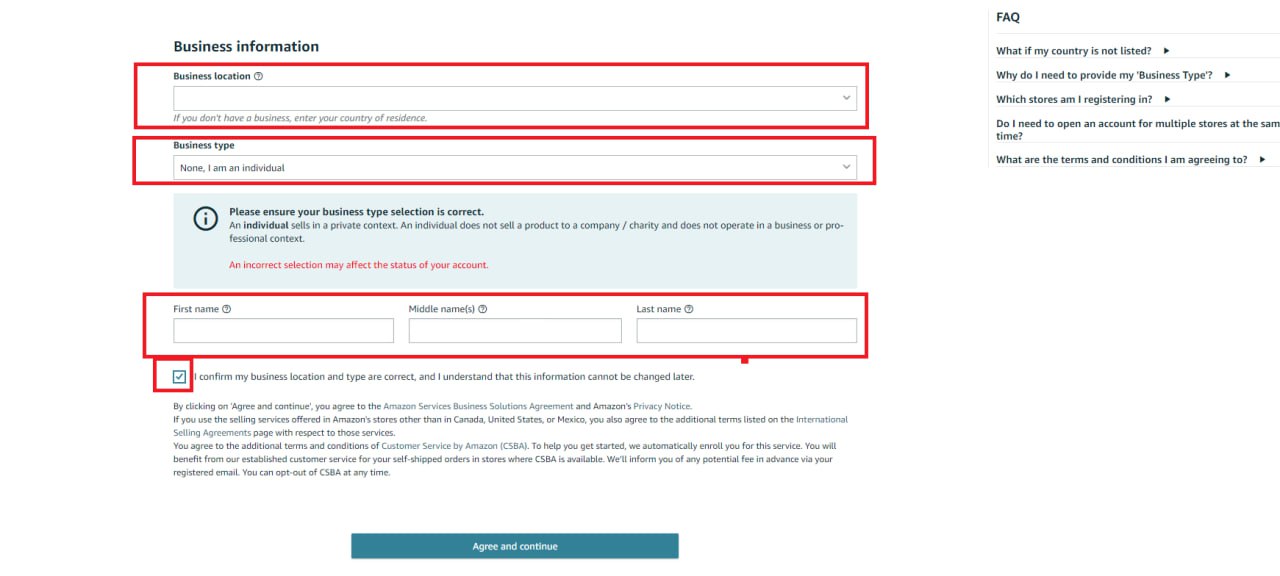
Step 6. Add your business location and business type
On the next page, enter the country where your business is registered. If you don’t own an officially registered business, enter the country where you live. Then, click “Agree and continue” at the bottom of the page.
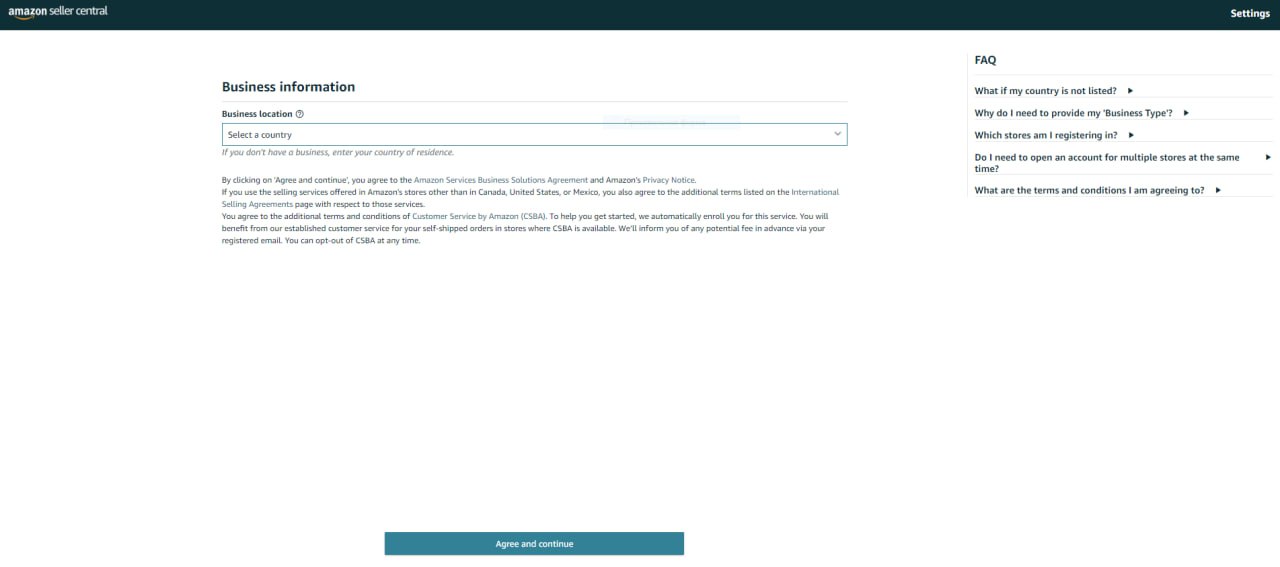
On the next page, enter the country where your business is registered.
Then, you will be prompted to add your business type. From the drop-down, choose your option.
If you are a registered business, select a state-owned, publicly-listed, or privately-owned business. If you are a charity organization, select that option. If you are a sole proprietor (self-employed person who owns a business without partners), choose that option. Lastly, if you are not a business owner, select “None, I am an individual.”
Then, click “Agree and continue.”
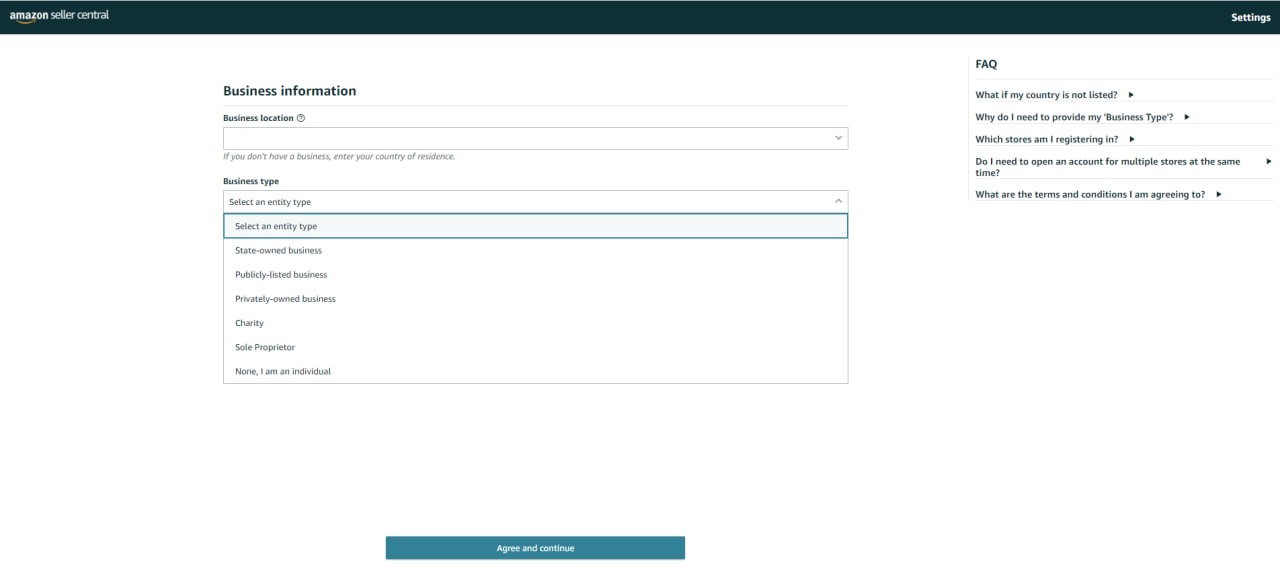
From the drop-down, choose your business type option.
Related: 13 Rules of OA Product Research Tested by Pain and Gain of Amazon Seller
13 Ways to Make Money on Amazon
Step 7. Specify your personal and business details
On the next page, add your first, middle, and last name, and tick the box “I confirm my business location and type is correct…” Then, click “Agree and continue.”
Step 8. Enter the primary contact person information
When you get to the Primary contact person information page, fill in your country of residence and birth, the address where you live, date of birth, and mobile number, where Amazon will send an SMS with a one-time verification pin.
Then repeat the characters in the corresponding field to confirm you’re not a robot. After that, click the “Send SMS” button to receive the one-time verification pin.

Primary contact person information page
When you get the one-time verification pin, fill it in the pop-up window and click “Verify.”
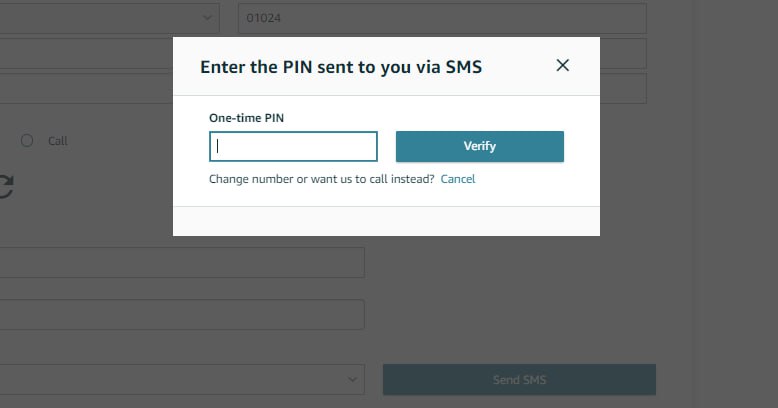
When you get the one-time verification pin, fill it in the pop-up window and click “Verify.”
Step 9. Add your payment method
On this page, fill in your credit card number, expiration date, and cardholder name. Click “Next.”
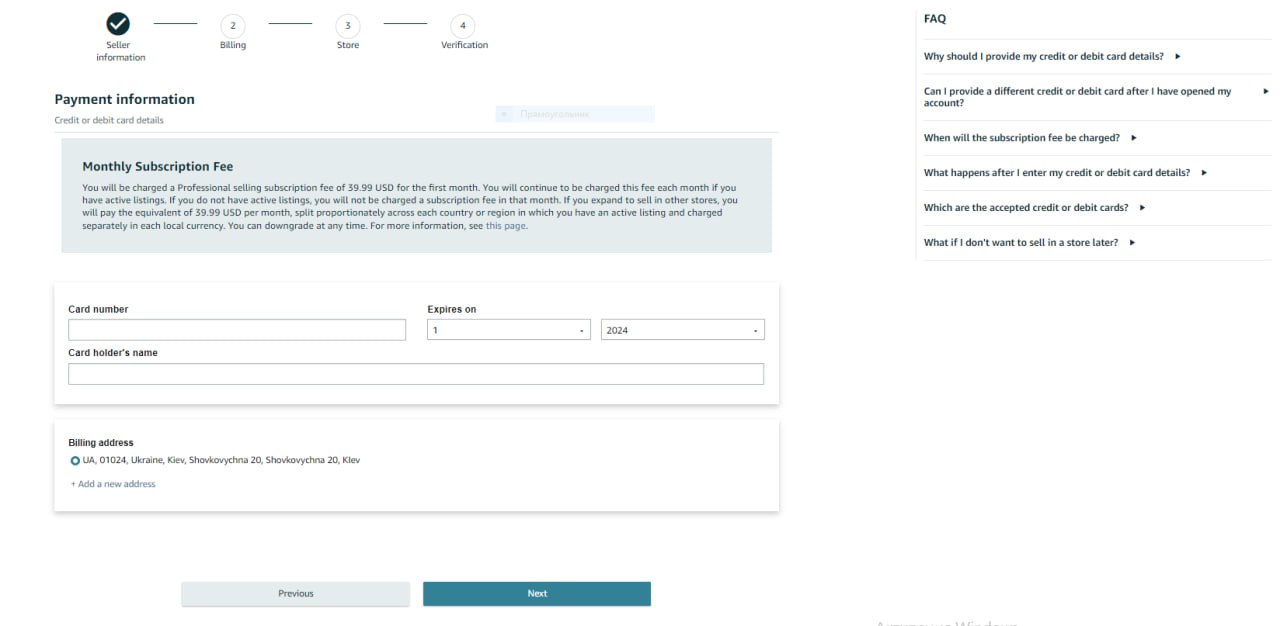
Payment information page
Related: Amazon Wholesale: All You Need To Know
How to Find Amazon FBA Wholesale Suppliers
Step 10. Submit your Amazon store’s name
Here, Amazon will ask you to choose the name of your Amazon store. Invent any unique name that doesn’t exist on Amazon. You can change it later if necessary.
Then you must answer if you have the Universal Product Codes (UPCs) for your products. If you don’t know, click “Yes” because the majority of the products have these codes.
Also, specify if you are the manufacturer and/or brand owner of the products you’re going to sell or if you are a certified brand representative. If you click “Yes” or “Some of them” you’ll need to answer if you own a registered trademark for these branded products.
Fill in the information and click “Next.”
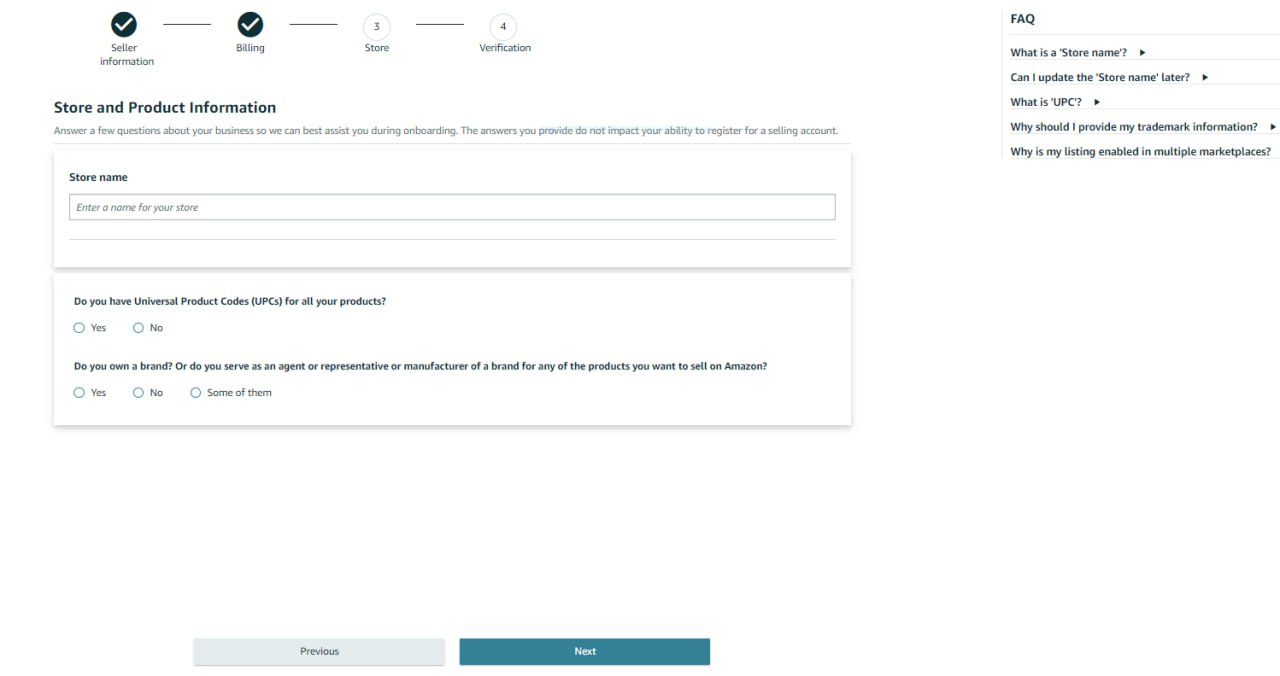
Store and Product Information page
Step 11. Verify your identity
In the next step, you’ll need to undergo a verification process. First, upload images of your passport or driving license, and a bank or credit card statement. Add the documents, and click Submit.
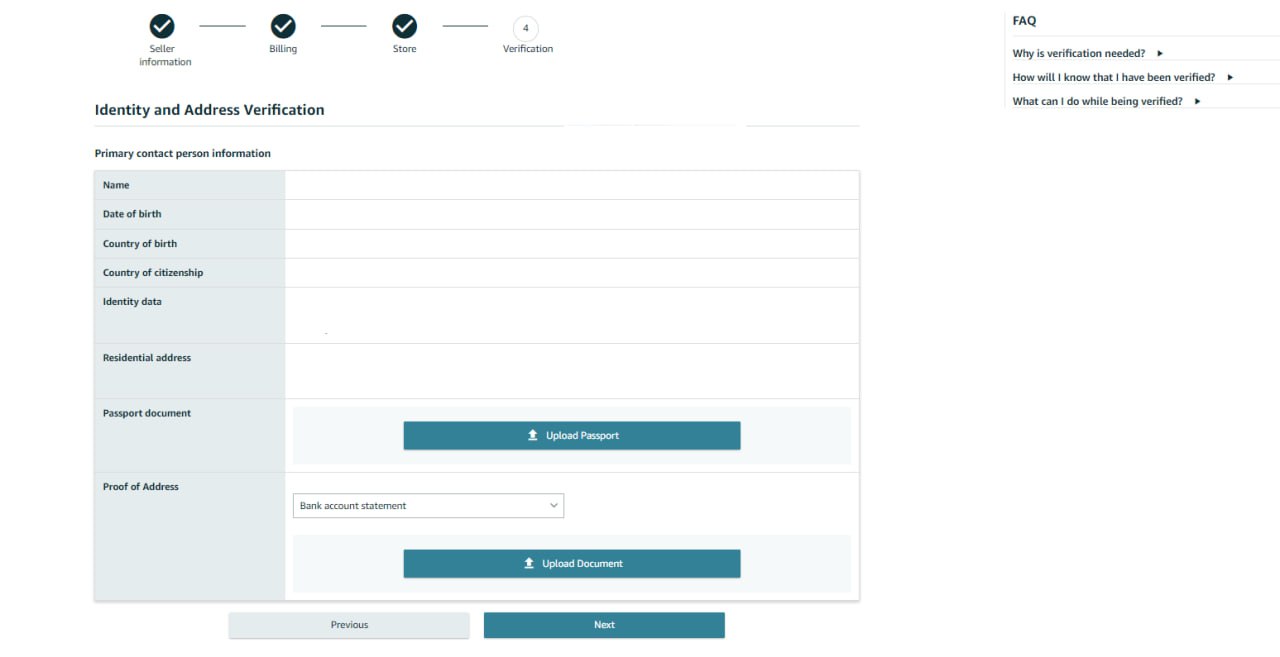
In the next step, you’ll need to undergo a verification process. First, upload images of your passport or driving license, and a bank or credit card statement. Add the documents, and click Submit.
Then, Amazon will ask you to schedule a video call with an Amazon associate to complete the verification to confirm the data you entered. You can do that at the end of your registration or schedule another time.
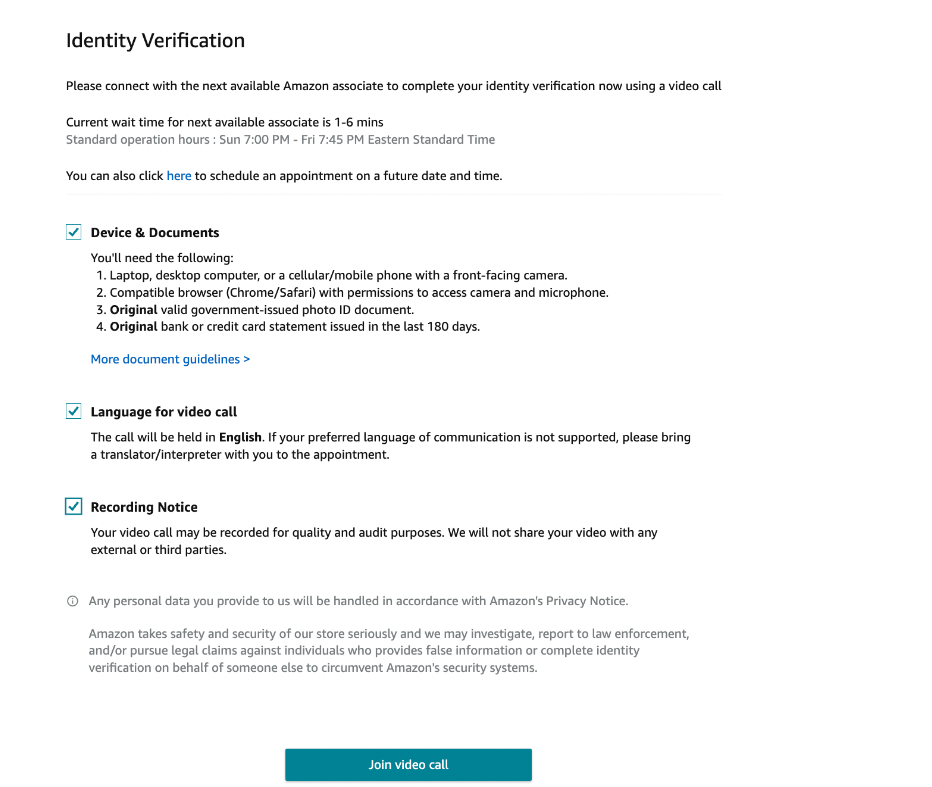
Identity Verification page
Step 12. Wait until Amazon approves your account
When you are verified, you can start using your Seller Central. Go to https://sellercentral.amazon.com and start your sales.
FAQ
What are the requirements to create an Amazon seller account?
To create an Amazon Seller Central account, you’ll need to be a resident of an Amazon-supported country and have a valid business or personal identity (passport or driving license), and an active bank account. In addition, you’ll need to choose a selling plan and decide on how you will fulfill customer orders.
Is it free to create a seller account on Amazon?
Creating an Amazon seller account itself is free. There are two options: an individual plan with per-sale fees or a professional plan with a monthly subscription but lower per-sale fees.
How can I open my Amazon seller account?
Head over to “Start selling with Amazon” page, click “Sign-in” and register a seller account by following Amazon’s prompts. Be prepared to provide your business and personal info, bank details, and choose a selling plan (individual with per-sale fees or professional with a monthly subscription).
Can anyone become Amazon seller?
Almost anyone can become an Amazon seller. As long as you live in a country supported by Amazon and have basic info like and have a valid business or personal identity (passport or driving license), and an active bank account, you can sign up for an Amazon Seller Central account.
Final Thoughts
To start selling on Amazon, you must register as a seller. For that, you need to create an Amazon seller account.
After that, you’ll need to select profitable products you’re going to sell. The best way to find them is to use product sourcing software. The most popular of them is Seller Assistant.
Seller Assistant is an all-in-one product sourcing software offering all the features vital for product sourcing. It combines three extensions: Seller Assistant Extension, IP Alert, and VPN by Seller Assistant, tools: Price List Analyzer, Brand Analyzer, Seller Spy, Bulk Restrictions Checker, and API integrations, and features: Storefront Widget, Side Panel View, FBM&FBA Profit Calculator, Quick View, Stock Checker, IP Alert, Variation Viewer, Sales Estimator, Offers, Restrictions Checker , and other features that help quickly find high-profit deals. Seller Assistant also offers integration with Zapier allowing to create custom product sourcing workflows.